Nails Inc. Gel Effect Plumping Top Coat


Lately I’ve been painting my nails more frequently than I’m used to because of the dress code at my new job. This has led me on a hunt for the perfect top coat. You know, the kind that keeps your nail polish looking perfect and doesn’t chip for an entire week. Ok, maybe that’s crazy talk, and this hunt is a lost cause. But I’m sure a product  exists that at least won’t chip for two days…that’s all I ask.

2

I decided to try Nails Inc. Kensington Caviar Gel Effect Plumping Top Coat. Wowza, that’s a mouthful. What attracted me to this product were the keywords “gel” and “plumping”, because I love the look of plump, glossy nails. This top coat looks fantastic when first applied, like a professional gel manicure. Sadly, it doesn’t last. A day after application (sometimes only a few hours later), the nail polish does something funky and looks as though it’s been cracked or shattered. Much to my disappointment, this happens every single time I use it. It only cost $13, which is quite decent for a Nails Inc. product; however, I’ve had the polish for just a few weeks and I only have two thirds of the bottle left. I definitely won’t be repurchasing this one when it runs out, but I’ll continue searching in hopes of one day finding my dream top coat.

Do you have recommendations for the perfect top coat?

xB

Standard

VIDEO: Get Summer-Ready!

Hello beautiful people!

I have finally finished my third year of university, and does it ever feel good! Sadly, however, summer just does not want to come. So, because of my great longing for warmer weather, I’ve been daydreaming about what products I’ll use once summer is finally here. I always like thinking ahead and being prepared (I’m the list-making type), so while it’s still a little bit early, here is a video with some of my must-have summer products.

Enjoy!

xB

Standard

I Heart Drugstore Makeup

It is the last day of Christmas vacation for me, and yet it’s a happy day because….I’m posting a new video! I decided to do the “I Heart Drugstore Makeup Tag”, because I use a lot of drugstore products in my day to day routine. So here are my thoughts on a few of my favourite drugstore products.

Enjoy!

x B

Standard

NEW YEAR’S EVE Emerald Smokey Eye

IMG_9540_Fotor_Fotor_Collage

I always have so much fun getting all dolled up for New Year’s Eve, which also happens to be my birthday, and this look is great for an evening out or a festive house party with friends and family! Because the eyes are so intense, I decided to go with a nude lip. Also, red lips can be a hassle to maintain with all the eating that goes on!

First I applied Too Faced Shadow Insurance all over the lid as a primer, and then I applied Maybelline Colour Tattoo in Tough as Taupe in the outer corner and crease of my eyes. From my Lancome Colour Design eyeshadow quad I applied “Designer”, a deep shimmery emerald colour,  over the centre of the lid, and then I applied “Volcano”, a deep shimmery taupe colour, in the outer corners and crease. Over top of Volcano I applied “IT List” in the very outer corners and took it just lightly through the outer crease. Above my crease line I applied the darkest shade from my Clinique Colour Surge eyeshadow duo Chocolate Kiss, and blended it out. To highlight the brow bone, I applied “Latte” just below the arch in my brow. I lined my outer lower lash line with “Volcano”, and then in the centre of the lower lash line I applied “Designer” and blended the two colours together. To finish, I applied a thin line of black eyeliner on my top lash line and smudged it out to increase the smoky effect, and then finished with several coats of mascara.

Have fun recreating the look, and happy New Year!

x B

Products used:

FACE

Too Faced Primed & Poreless Pure Oil Free Skin Smoothing Face Primer for Sensitive Skin

Tarte Amazonian Clay 12-Hour Full Coverage Foundation

Vichy Dermablend Fluid Corrective Foundation ( to spot conceal)

Rimmel Stay-Matte Pressed Powder

NARS Laguna Bronzer

Clinique Blush in Smoldering Plum

Benefit Watt’s Up! Highlighting Stick

ELF Studio Makeup Mist & Set Spray

EYES

Too Faced Shadow Insurance

Maybelline Colour Tattoo in Tough as Taupe

Lancome Eyeshadow quad (Latte, Designer, Volcano, “It” List)

Clinique Colour Surge Eyeshadow duo in Chocolate Kiss (the darker shade)

Rimmel Soft Kohl Kajal Eye Liner Pencil in Jet Black

Sephora Outrageous Volume Dramatic Volume Mascara

LIPS

ELF Matte Lip Colour in Natural

Revlon lip gloss in Bellini

Standard

Give Me Some Lip Set – Guest Post by Bethany

Becca has so graciously let me write a guest post for her blog when I asked her if I could, which I am so excited about! I thought it was especially fitting since my name is Bethany and I love all things beauty, so keeping the Beauty with a B going!

I recently purchased the Give Me Some Lip set from Sephora. This is a kit with smaller sizes of 6 different lip balms, glosses, and pencils from different high-end brands. It only costs $30 so it is a great way to try out a sample size of a variety of brands and colours before you purchase the full-size product (for instance, the Bite pencil alone retails for $28). After having tried each one out over the past month, here are my thoughts:

s1552124-main-Lhero

6. NARS Lip Gloss in Turkish Delight (0.14 oz)

This was my least favourite of the bunch due to the colour, which was not great for my fair skin. It was a pale pink and made my lips seem to disappear and it felt a bit sticky. Unfortunately, it also has some not-so-nice chemicals in it, like parabens, which I’m not apt to putting on my lips if I can avoid it! It’s too bad, because I was really excited to try a Nars product, but this shade of gloss was not for me!
5. Laura Mercier Lip Glacé in Bare Pink (0.10 oz)

This lip gloss for me was just “ok”. Like the name suggests, this is a very bare pink colour, which was very subtle, so it is best paired as a gloss over a lip stick or pencil to add some shine. It wasn’t too sticky and lasted decently. But for me, I like my lips to have some colour, so I don’t think I’d buy this one again, at least not in this shade.
4.  Fresh Sugar Rosé Tinted Lip Treatment (0.08 oz)

This is a lip balm that offers SPF 15 coverage. It applies with a sheer light red colour and definitely makes your lips feel great! It’s made with real sugar, currant oil, antioxidant grapeseed, and vitamins A, C, and E. It’s also free from parabens, sulphates, and a bunch of other nasty chemicals, so you know it’s safe to keep on your lips. It’s called a “treatment” because the product boasts that it has been scientifically proven to keep lips moisturized for up to six hours after your initial application. I didn’t find that it made a huge difference on my lips, but I also haven’t worn it daily because it’s been too much fun switching between all of these 6 different items! But the study was based on 4 weeks of continuous wear and 2 applications per day. Needless to say, it’s a great tinted balm to keep your lips looking and feeling soft. I’m just not sure it’s worth the splurge over your average drugstore variety lip balm.

3.  Tarte LipSurgence™ Lip Luster in Glitzy (0.10 oz)

I love Tarte Amazonian Clay blushes, so I was excited to try out a lip pencil from them. It was a tough choice between this one and the Buxom lip gloss for 2nd place. I gave the Tarte pencil the 3rd spot just due to the bulky size of the pencil. This is the largest one in the kit and it’s quite a bit bigger than your average lip stick or gloss, making it not-so-convenient to carry around. That aside, it offers a great, subtle peachy colour with a lot of sparkle and shine to it. It’s definitely suitable for work or a night out. I found it doesn’t last long and needed frequent re-application. But the pencil style does make it easy to apply with no mirror and it’s a twist-up, so bonus! The “LipSurgence” technology that Tarte advertises promises to increase moisture by “an astonishing 6000%”. I didn’t necessarily find that, but it was a moisturizing lip pencil when other pencils can tug on your lips when applying and leave them feeling dry. It’s again free of those icky chemicals like most of the items in this Sephora kit. Verdict: great colour and application, but a bit bulky and didn’t offer the “stain” I like with lip pencils.

2.  Buxom® Full-On™ Lip Polish in Dolly (0.07 oz)

Advertised as a “cult favourite”, I can now see why! This is a lip gloss that offers a minty taste and smell to it. It actually makes my lips feel tingly when I apply it, which I love, but I know others may not, so be warned if that’s not your thing! It offers a subtle, dark pink colour with a great shine and shimmer. I’m not sure if I’m imagining it, but it does seem to make my lips look plumper (score!). It looks great on my skin tone and helps pull a look together, especially when you’re playing up another one of your features, such as your eyes or cheeks. It’s not sticky, which I often find is a problem for me with lip glosses, and it makes your lips feel soft. It doesn’t have great lasting power, but it stays on fairly well for a gloss. Even better, it’s made without parabens and sulphates and offers the added benefit of vitamins A and E. It’s definitely going to be a keeper in my makeup collection!

1.  Bite Beauty High Pigment Pencil in Rhubarb (0.05 oz)

This was BY FAR my favourite from the kit. Before I even talk about the pencil itself, I need to gush about Bite. Bite is exclusive to Sephora (and Canadian, yay!) and their products are made with food-grade ingredients that are healthy enough to eat! It’s free of parabens, sulphates, synthetics, and much, much more. Ok, now for the pencil! It’s a high pigment pencil, so it applies easily onto your lips. The colour Rhubarb is a fantastic, matte, plummy rose colour, which looks ah-maz-ing on my skin tone, while not being over-done, making it a great every-day wear lip colour with a bit of pop. The lip product contains the antioxidant resveratrol of five glasses of red wine – great colour and antioxidant benefits? Double yay! It also lasts well throughout the day. I probably applied it twice throughout my eight hour work day and it stayed on well with eating and drinking. I found it did bleed a teeny bit without a lip liner, but it was minimal. Unlike other lip pencils I’ve tried, this one didn’t dry out my lips and left them feeling creamy and moisturized. The packaging is also great because it’s a twist up rather than a pencil that needs sharpening. I’ve now re-ordered the full-size version of this pencil from Sephora and always keep it in my purse!

Standard

FACE OF THE DAY: Everyday Glam

There’s nothing like getting a new “do” at the end of summer to freshen up your look for fall! I recently got my hair chopped off again, and I now feel ready to start the new season with a bang(s) (pun intended).

The makeup look I went for today is what I would call everyday glam. It was quick and easy to create, and left me smiling for the rest of the day.  PicMonkey Collage

The pale eyeshadow, the lack of eyeliner, and the big lashes cause my eyes to look bigger and brighter — perfect for me because my eyes are on the smaller side, so I’m always looking for ways to make them appear larger and less hooded. I’m currently smitten with the pink lipstick I’m wearing, and it definitely adds a flirty touch to this look!

Here are all the products I used!

FACE

PUR Minerals Correcting Primer

PUR Minerals 4-in-1 Mineral Tinted Moisturizer

Vichy Dermablend Fluid Corrective Foundation

Clinique blush in Smoldering Plum

Rimmel Stay Matte pressed powder

PUR Minerals 4-in-1 Pressed Mineral Makeup (this one I used to bronze and contour my face)

Wet N Wild Colour Icon Brow & Liner pencil in Mink Brown (on my eyebrows)

ELF Wet Gloss Lash & Brow Clear Mascara (on my eyebrows)

EYES

Urban Decay Naked Basics palette – Foxy all over my eyelid lid, and Venus in the inner corners of my eye

Rimmel The Max Volume Flash mascara

LIPS

Rimmel Lasting Finish Lipstick in 006 Pink Blush

Revlon Colorburst lipgloss in 042 Bellini

x B

Standard

Mascara Madness

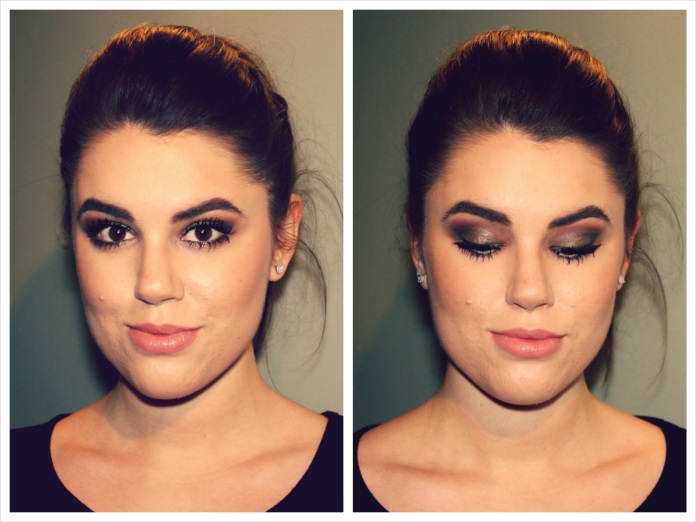
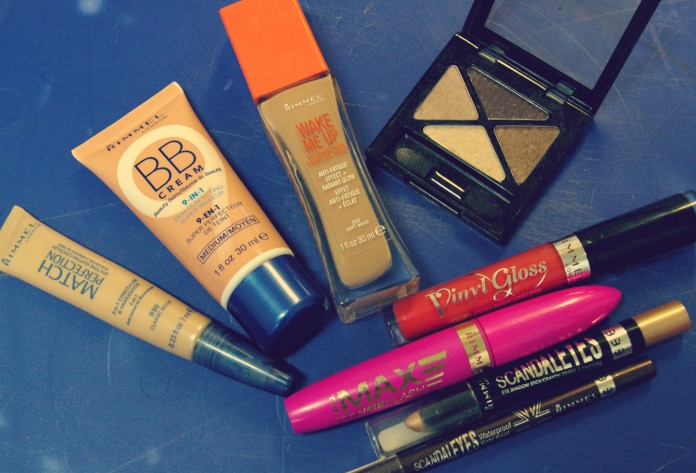
When it comes to makeup, mascara is hands down my favourite beauty product.  I’m a big fan of dramatic lashes, and I love trying out new mascaras. Today I’m reviewing a few mascaras I’ve been using over the last few weeks, some of them old favourites, and some new to me.  A few things I look for in a mascara are: extreme length and volume, no crumbling, and no rubbing off onto my eyelid.

IMGP8615_Fotor_Fotor2

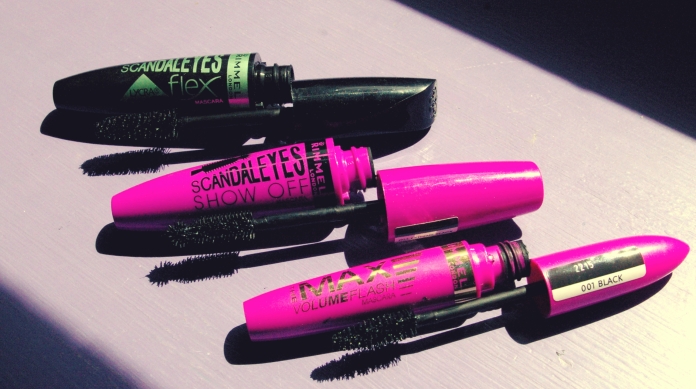
1. Rimmel Scandaleyes Lycra Flex

Much to my great disappointment, the brush on this mascara is so massive that I can’t even give a review on the formula because it wouldn’t go on my lashes.

2. Rimmel Scandaleyes Show Off

It’s another sad story for the Rimmel Scandaleyes. The formula didn’t lengthen or volumize, and the brush was really hard to maneuver. I was looking forward to trying out this brush because it looks similar to the Benefit They’re Real! wand, but instead the only “scandal” was the hassle.

3. Rimmel The Max Volume Flash 

This was the very first Rimmel mascara I had ever tried, and it set the bar quite high. I’m a huge fan! It’s extremely lengthening and volumizing, and while it dries quite hard it doesn’t ever crumble! The one down side is that it can get clumpy due to excess product on the brush. But when that happens I just scrape the excess back into the tube.

IMGP8671_Fotor

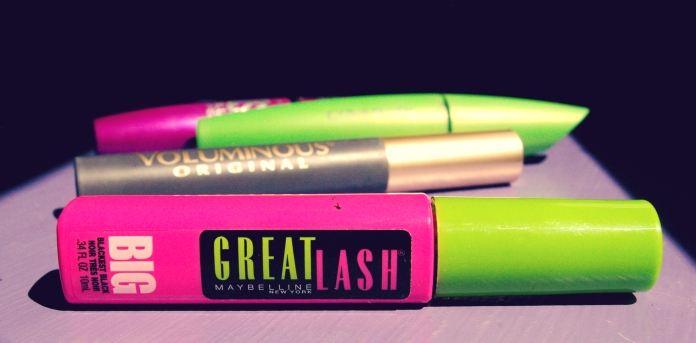
4. Maybelline Great Lash Big

Let me start off by saying, I love the packaging for this mascara! I haven’t bought this one in years past, but from a young age I’ve always associated mascara with this packaging, and still do. I don’t know why that is, maybe I saw it in a movie as a kid or it stood out in stores because of the colours.

The formula is quite unimpressive as it only provides minimal length and volume.  Also, it dries quite soft, which causes it to rub off onto my eyelids since I have long lashes and oily eyelids. However, it’s good for a natural look, or if you don’t like wearing a whole lot of makeup.

I probably should have bought the original Great Lash because the smaller brush would work better for my eye size. Having said that, the big brush isn’t excessively large like the Rimmel Scandaleyes Lycra Flex brush.

While I don’t dislike this product, I don’t think I’d repurchase it, since it doesn’t possess the typical qualities I look for in a mascara.

5. Maybelline Volum’ Express the Falsies Flared (how do you pronounce that… VOLOOM??)

I read through so many reviews before making this purchase, and everyone said they loved it. So my expectations were set really high…The first thing that I didn’t like about this mascara is that it has an awful smell. Secondly, it crumbles like crazy. It starts to crumble before I even finish applying it! Now, it does provide amazing volume, and I really like the bendy brush and how it curls the lashes. But, unfortunately the bad outweighs the good for The Falsies Flared.

6. L’Oreal Voluminous Orginal

This is the first L’Oreal mascara I’ve ever tried, and I’m really impressed. It lengthens, it provides dramatic volume, and it doesn’t crumble. On hot days it does start to rub off onto my eyelids after a few hours of wear. But on regular days I don’t have this problem.

7. CoverGirl Clump Crusher

When I first bought this I was skeptical as to whether or not it would live up to its name, but it actually does crush clumps! Now, the packaging claimed to add 200X the volume, and in my opinion it adds only 3 to 4X the volume. But, this mascara is great for a natural look, because it gives great length, a little volume, and separates all the lashes. Also, when I’m using another mascara and things get clumpy or if I’m going for big lashes then I’ll use this mascara at the end to comb all the clumps out. Love!

So when it comes to choosing favourites, my top two for big long lashes are Rimmel The Max Volume Flash and L’Oreal Voluminous Original. And for a natural look or paired with another mascara for de-clumping I use CoverGirl Clump Crusher.

What’s your must have mascara?

x B

Standard

FOTD: The Rimmel Look

Rimmel-face

I was going through my makeup recently and realized that I have an entire face worth of Rimmel products (and more!). So I thought I’d post a face of the day consisting solely of Rimmel cosmetics. So, here it is!

The Face

1. I applied a thin layer of BB cream as a primer, and then applied Wake Me Up foundation using my Real Techniques buffing brush. Now, I should mention that I didn’t have a Rimmel concealer that would work for hiding blemishes, so I cheated and used my Vichy Dermablend Foundation to cover up any spots.

2. For concealing my under eyes I used Match Perfection Concealer, and then lightly powdered my whole face with Stay Matte Pressed Powder.

3. I lightly contoured using the Natural Bronzer, and then for blush and highlight used the Match Perfection Blush.

pans_Fotor

The Eyes

I wanted to go for a natural smokey eye look…

4. As a base, I applied Scandaleyes Shadow Stick in Bulletproof Beige all over the lid to help the eyeshadow last longer.

5. Next, using my Glam’Eyes quad in Smokey Brun, I applied the lightest colour in the inner part of my lid, the pinky nude colour over the rest of the lid, and then the 3rd darkest colour at the outer corner of my eyes and in the crease. I didn’t use the darkest shade because I wanted a natural smokey eye.

6. I lined my eyes using the Scandaleyes Kohl Kajal eyeliner in brown. I’m in love with this eyeliner! It’s a beautiful shimmery brown, and is really soft yet long lasting. But, it’s not great for making sharp wings, so I used a liner brush to drag out the wing at the outer eye.

7. MASCARA!!! My favourite part!!! I applied several coats of one of my favourites: Volume Flash the Max.

Rimmel makeup

The Lips

8. The very final step to my face was a sweep of Vinyl Gloss in the colour Fashion Icon — a beautiful orangey pink colour.

I hope you enjoyed my very first face of the day! Leave me a comment : )

x B

Standard